
Last Updated: 2 November 2026
Quick Summary
To make a personalised gift at home, choose the recipient and occasion first, then pick one strong personal detail such as a name, date or photo. Use a simple method like hand-lettering or stick-on vinyl on a flat item, test on a scrap first, and proofread every word before you apply it.
- Pick the occasion first, then the recipient’s taste, then the object.
- Use one strong personal detail, such as a name, a date or a short message.
- Use a photo at least 300 dpi at print size; screenshots often print poorly.
- Test your method on a scrap piece before working on the final item.
- Proofread names and dates twice, and have a second person check them.
Table of Contents
- Choosing the Right Personalised Gift Ideas for Your Recipient
- Gathering Materials and Equipment, Including Beginner Alternatives
- Planning Your Design and Adding a Name, Message or Photo
- Making Homemade Personalised Gifts Step by Step
- Creating Personalised Gifts to Make with a Digital Cutting Machine
- When to Use Custom Printed Gifts Instead of Making Your Own
- Booking Your Personalised Gift Project and Checking Quality Before It Leaves Your Hands
- Frequently Asked Questions
Choosing the Right Personalised Gift Ideas for Your Recipient
Choosing the right personalised gift starts with the person receiving it. A gift that suits a grandmother will rarely suit a university student. Start by listing the recipient’s interests, the occasion, and how close you are to them.
Many people find that a personal detail works better than an expensive item. A shared joke, a favourite place or a favourite song can turn an ordinary object into a keepsake.
Quick checklist before you choose:
- The recipient’s hobbies or interests
- The occasion and the date it falls on
- Your budget, set before you start shopping
- The time you have before you need it
- Whether the item will be displayed or used daily
Keep the idea simple. One strong personal detail, such as a name, a date or a short message, is usually enough. More than that can make a gift look busy.
Personalised gift ideas for common occasions include birthdays, anniversaries, weddings, graduations and thank-you gifts. Each one suggests a different tone. A wedding gift may suit a warm, formal message, while a birthday gift can be playful.
We recommend picking the occasion first, then the recipient’s taste, and finally the object. This order keeps the gift focused and stops you from buying something that does not fit the moment.
Gathering Materials and Equipment, Including Beginner Alternatives
You do not need expensive equipment to make a personalised gift at home. The trick is to match the method to the item, then buy only what that method needs. Most beginners overspend on tools they use once; a better approach is to start with the cheapest method that will survive the item’s intended use.
Core materials, by method
| Method | What you need | Typical cost | Best for |
|---|---|---|---|
| Hand-lettering | Paint pen or fine brush, acrylic paint, masking tape | £4-£12 | Mugs, tiles, wooden boxes, signs |
| Stick-on vinyl | Pre-cut vinyl letters or shapes, transfer tape, squeegee | £6-£15 | Notebooks, bags, glass jars, laptops |
| Photo transfer | Printable transfer paper, inkjet printer, plain base item | £8-£20 | Frames, coasters, canvas, memory boxes |
| Digital cutting | Cutting machine, vinyl or card, weeding tools, transfer tape | £150-£350 (machine) plus £10-£20 consumables | Repeat designs, precise lettering, stencils |
| Engraving (outsourced) | Design file, item to engrave | £15-£40 per item | Metal, glass, wood, keepsakes |
Prices vary by retailer, material and quantity, so check current costs before you buy.
Beginner alternatives to try first
- Hand-lettered names with a paint pen instead of a machine cut, a fine Posca-style marker gives a clean line on ceramic and wood.
- Stick-on vinyl letters for a crisp, professional look without a cutting machine.
- A printed photo glued neatly to a plain wooden base, sealed with a clear acrylic spray.
- A marker on a ceramic tile, baked or sealed with a clear coat, for a low-cost coaster.
- A printable iron-on transfer for fabric items such as tote bags or aprons.
What to skip until you have more practice
Avoid glass etching cream, resin encapsulation and multi-colour layered vinyl on a first attempt. Each needs ventilation, curing time or precise registration, and mistakes are hard to reverse. A common pattern is to start with a single-colour design on a flat surface, then move to curved or fabric items once you are confident.
A realistic budget for a first project
Setting a budget before you start keeps a first project affordable.
Test your method on a scrap piece before you work on the final item. This small step prevents most early mistakes and shows you how long the paint or ink takes to dry.
Check the label on any spray sealer or adhesive for drying and ventilation requirements. Some products need 24 hours to cure before the item can be handled or washed.
Planning Your Design and Adding a Name, Message or Photo
Step 1: Choose the personal detail
Pick one strong element, a name, a date, a short message, a photo or a map coordinate, and build the design around it. Two or three competing details make the item look busy.
Step 2: Check the photo before you commit
Photo quality is the most common reason a printed gift disappoints. Use an image that is at least 300 dots per inch (dpi) at the size it will be printed.
- Choose a sharp, well-lit image with a clear subject.
- Avoid heavy filters, which can print muddy.
- Crop to the shape of the item before printing so nothing important is cut off.
- Check for red-eye, closed eyes and distracting backgrounds.
Step 3: Set the size and font
Text should be readable from a normal viewing distance, roughly 5 mm cap height for a mug or coaster, larger for a wall piece. Short names and dates work best.
Step 4: Proofread twice
Spelling and date errors are the most common and most embarrassing mistakes. Read the text aloud, check the spelling of every name against the recipient’s own writing, and confirm the date format (day/month/year is standard in the UK).
Step 5: Match the finish to how the gift will be used
A mug needs a design that survives dishwashing; a wall plaque can carry more delicate detail. Choose a method and sealer suited to the item’s daily life:
-
**
-
Decorative only: paper, card and unsealed photo transfers on frames or plaques.
Step 6: Plan the layout on paper
Sketch the position of the name, message or photo on paper first, then mark it lightly on the item with masking tape. This keeps the design balanced and centred.
A simple planning method: write the name or message on paper, sketch its position on the item, choose a font size that fits the space, print a test copy at actual size, then check spelling and dates twice before applying anything.
Colours can shift between screen and print, and vinyl shades vary between batches. If you are making several matching gifts, buy all your materials in one order so the colours match.
Making Homemade Personalised Gifts Step by Step
This is where the gift takes shape. Work slowly and keep your materials clean. Most mistakes happen when people rush the final step.
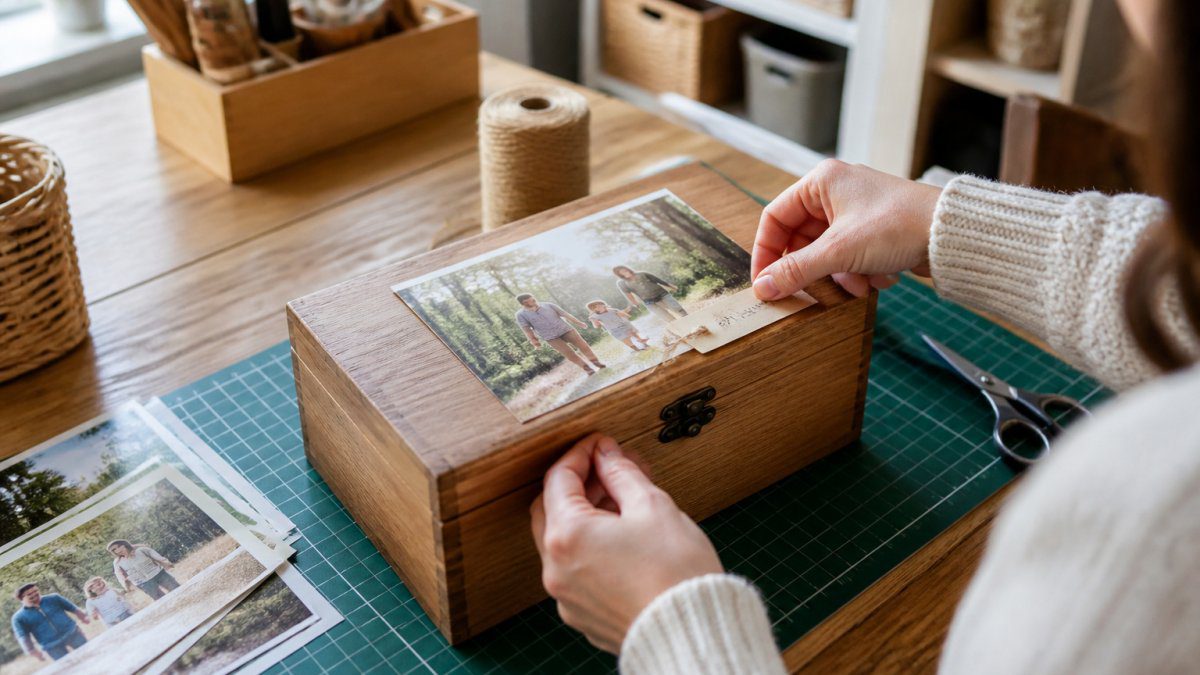
Before you begin, make sure the surface is clean and dry. Dust, grease or moisture can stop paint, vinyl or ink from sticking properly.
Once the surface is ready, follow these steps:
- Lightly sand or wipe the surface to remove dust
- Position your design using masking tape to hold it in place
- Apply your name, message or photo carefully
- Smooth out any bubbles or wrinkles with a soft cloth
- Remove the tape slowly and check the edges
- Allow the item to dry or cure for the time the product recommends
- Seal the finished piece if the material needs protection
Watch out: Peeling masking tape too quickly can lift fresh paint or ink. Lift it slowly at a low angle.
Patience matters more than speed. Leaving the item to dry fully makes the finished piece look neat and lasts much longer.
Creating Personalised Gifts to Make with a Digital Cutting Machine
A digital cutting machine can speed up the process and improve accuracy. It cuts vinyl, paper and thin materials from a design file you create or download.
Start with a simple design. Names in a clean sans-serif font are easy to cut and easy to weed. Avoid very thin lines or tiny details on your first attempt.
The basic process looks like this:
- Create or upload your design in the cutting software
- Set the material type and blade depth
- Cut a test piece before cutting the final item
- Weed away the excess vinyl with tweezers
- Apply the design with transfer tape
Different machines work in slightly different ways, so read your manual for the correct settings. A test cut saves time and material.
This method suits bags, mugs, notebooks and wooden signs. It is a good choice when you want the same design repeated across several gifts.
When to Use Custom Printed Gifts Instead of Making Your Own
Homemade gifts show effort, but they are not always the best choice. Sometimes a professionally printed item gives a cleaner result, especially for large quantities or detailed photos.
Making your own works well for one or two special gifts. You control every detail and can add a personal touch that a shop cannot copy.
A custom printed gift may be the better option when:
- You need several matching gifts for a wedding or event
- The design includes detailed photographs or full colour artwork
- You have a short deadline and cannot afford mistakes
- You want a durable finish that handles frequent use
Our personalised mugs suit gift-givers who want a finished item without the setup time. You can also browse our personalised wooden bottle opener for a practical, ready-made option.
Pricing depends on quantity, design complexity, and delivery date, so check the product page or request a quote for current costs.
Booking Your Personalised Gift Project and Checking Quality Before It Leaves Your Hands
Whether you make the gift yourself or order it, a final quality check protects the result. Look at the item in good light and check every word and date.
Use this checklist before the gift is wrapped or sent:
- The name and spelling are correct
- Colours look even and clear
- Edges are neat with no peeling
- The finish is dry and smooth
- The item is packed to avoid scratches
If you are booking a custom project, leave enough time for production and delivery. Last-minute orders leave little room to fix problems. Contact the provider early if you need a change.
A personalised gift takes planning, but the result is worth the effort. Start with the recipient, choose a method that fits your skills, and check the final piece carefully. With those steps, your gift will look thoughtful and well made.
Frequently Asked Questions
How do you personalise a gift?
Start by choosing the item and the detail you want to add, such as a name, short message, date or photograph. Decide whether the personalisation will be handwritten, printed, engraved or cut, then test the method on a spare piece of the same material before committing to the final gift. Keep the design simple so the personal detail stands out, and check spelling carefully before you start. Matching the detail to the recipient, for example a wedding date for a couple or a favourite photo for a parent, usually makes the gift feel more thoughtful than a generic decorative addition.
What are some good personalised gift ideas?
Popular personalised gift ideas include custom mugs with a shared memory and personalised wooden items. For a milestone such as a wedding or anniversary, a printed map of a meaningful place or a message card written in the recipient’s favourite colours works well. Choose an idea that suits the recipient’s everyday life, so the gift gets used or displayed rather than stored away.
What can I put on a personalised gift?
Common options include a name, initials, a short message of up to a few lines, a date, a photograph, a logo or a small illustration. Keep the text short and large enough to read, and avoid very fine detail on items that will be handled often. Check how much space the item offers, since mugs, coasters and boxes have different printable areas. If you plan to add a photograph, use a high-resolution image so the detail remains clear once printed or cut.
How can I make a personalised gift look professional?
Keep the layout symmetrical or clearly aligned, use no more than two fonts, and make sure the personal detail is the focal point. Use a consistent colour palette and check the design at the actual size of the finished item. Test your method on a spare piece first to spot misalignment, smudging or colour shifts. Finish with a clean surface, neat edges and suitable packaging, which often makes a home-made gift look as polished as a bought one.
